Everything You Need to Know to Hike Col Raiser to Seceda Rideline
There are some things in the world that you just have to see. Hiking from Col Raiser to Seceda ridgeline really is one of those “pinch-me” experiences where you can’t quite believe the views in front of you are real.
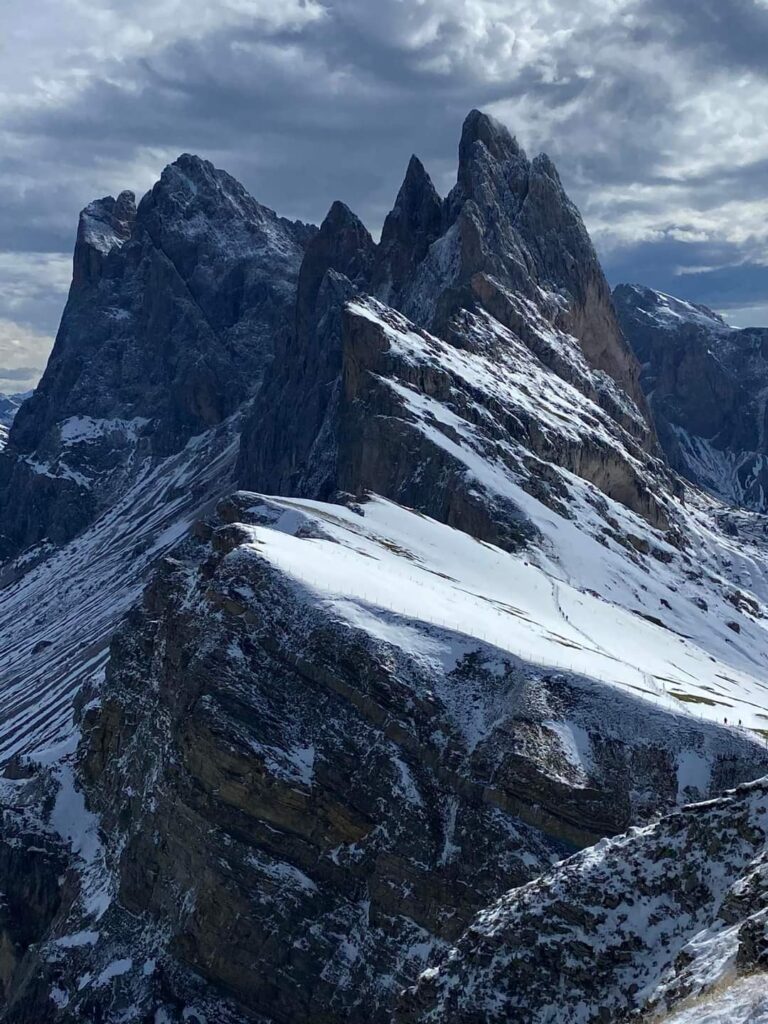
We spent two incredible weeks exploring the Dolomites — from Lago di Braies and Cinque Torri, to Seceda. To be honest you can’t really go wrong when it comes to views in the Dolomites, but Seceda is a little bit special. Its jagged, cinematic ridgeline might just be the most recognisable in the mountain range. And when we visited, a fresh layer of snow had recently fallen, adding to the drama of those jagged mountain peaks.
For our visit, we completed the Col Raiser to Seceda hike. This guide outlines everything you need to know, including the route and best time to visit.
 Why Visit Seceda?
Seceda soars over 2,500m (8,200ft) above Val Gardena, within the Puez Odle Nature Park. From the villages of Ortisei, Santa Cristina, and Selva, it is one of the most impressive peaks in the area.
The Odle mountains (or “needles” in Ladin) live up to their name — sharp, spear-like limestone peaks cutting into the sky. This hike has something for everyone – one moment you’re hiking through rolling alpine pastures, the next you’re face-to-face with cliffs so steep it feels like you’ve reached the edge of the world. On sunny days the peaks seem to rise above you forever. On moody ones, the clouds cling to the crags, adding to the drama and atmosphere.
Also if you love stopping off at a rifugio during your hikes (and who doesn’t?) then you’ll love this route – with about 5 different rifugio’s along the way.
There are lots of different hikes and routes you can take to the summit. Or you can also choose to take a chairlift or gondola all the way to the top if prefer. This is just the particular trail we chose to take. The route from Col Raiser to Seceda ridgeline isn’t one of the hardest hikes you can do in the Dolomites, neither is it the longest hike in the region. But it is one of the most impressive. Dotted along this route are several rifugio’s too, so there are lots of opportunities to enjoy the views and the local delicacies along the way.
 Starting the Hike: Col Raiser
First up, you need to catch the Col Raiser Cable Car in Santa Cristina. We bought a return ticket, which cost about €32 each. For up to date pricing and operating hours, be sure to check the official website.
We arrived not long after opening and although the car park was semi-busy, we found a space no problem and didn’t need to queue for our tickets either. They also had a car park attendant to manage numbers, which helped keep everything running smoothly.
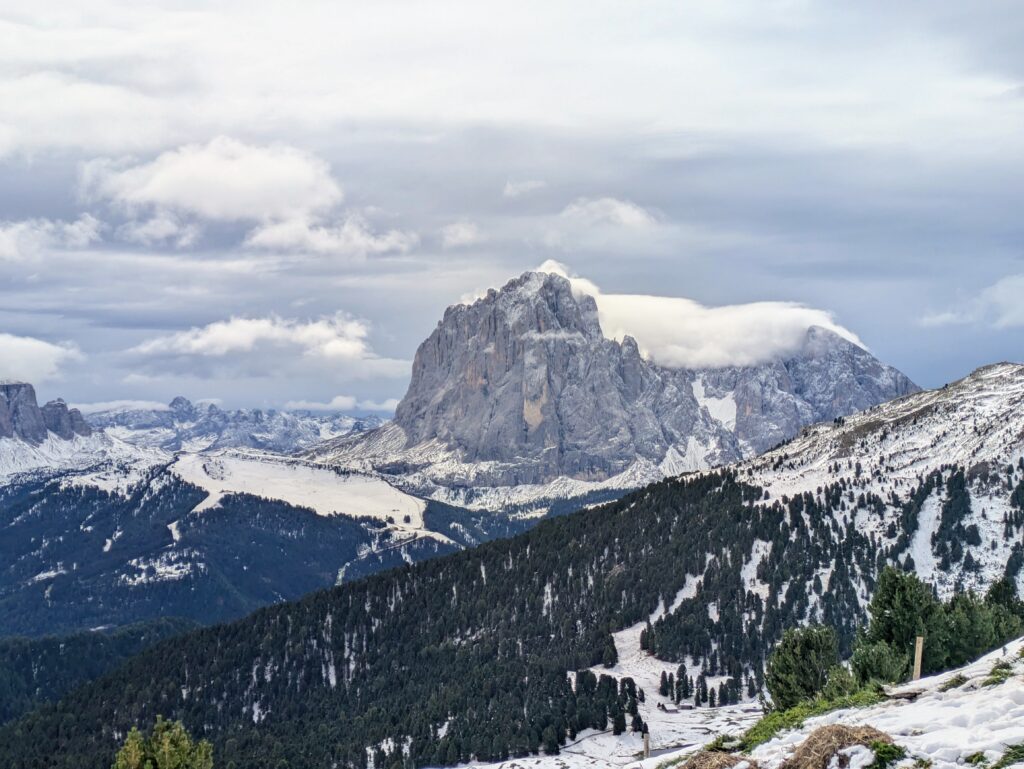
The whole cable car journey takes about 15 minutes, moving you swiftly from A to B. As you rise above the forest, the views open up to reveal the Sassolungo massif: a real tease of what’s to come once you begin the hike. At the top station (Almhotel Col Raiser), you’re ready to begin the hike, already at 2,100m.
 Rifugio Fermeda
From here you’ll need to follow signs for Fermeda / Seceda – or Trail 4A. This is an easy 15 minute walk, which is mostly flat and a nice warm-up for what’s to come. Already you’ll have jaw dropping views of the surrounding Dolomites peaks. If you’re Rifugio counting on this hike, then Fermeda is your first rest stop. You can stop here for a coffee and a quick bite to eat if you fancy. Otherwise, continue onto Trail 2, which begins the steady climb up towards Seceda.


Baita Sofie & The Seceda Summit
From Baita Daniel, it’s another 300m of ascent to the summit — not the longest climb, but your thighs will definitely feel it. For us, with snow underfoot, the trail was easy to follow thanks to the footprints of hikers ahead, but the compacted snow and ice made it so slippery. Straying off the track wasn’t much better either with shin-deep snow slowing us down. Still, the promise of those summit views kept us pushing upward.
Reaching the top cable car and chairlift station, right beside the official Seceda summit, felt like a reward in itself. Suddenly the whole Dolomites opened up around us, with peaks rolling in every direction.
Before heading out to the famous ridgeline, we treated ourselves to a well-earned stop at Baita Sofie. Possibly the poshest and most beautiful rifugio we’d been to, with glass-fronted windows and sweeping panoramas. We sat inside, warm and toasty, gazing out at the uninterrupted views of the Sassolungo group glowing in the distance — a perfect pause before the final stretch. We’re both vegetarian too, and we were absolutely treated here to a trio of dumplings and a glass of wine each, which was honestly so delicious!
 Seceda Rideline and the Loop Back
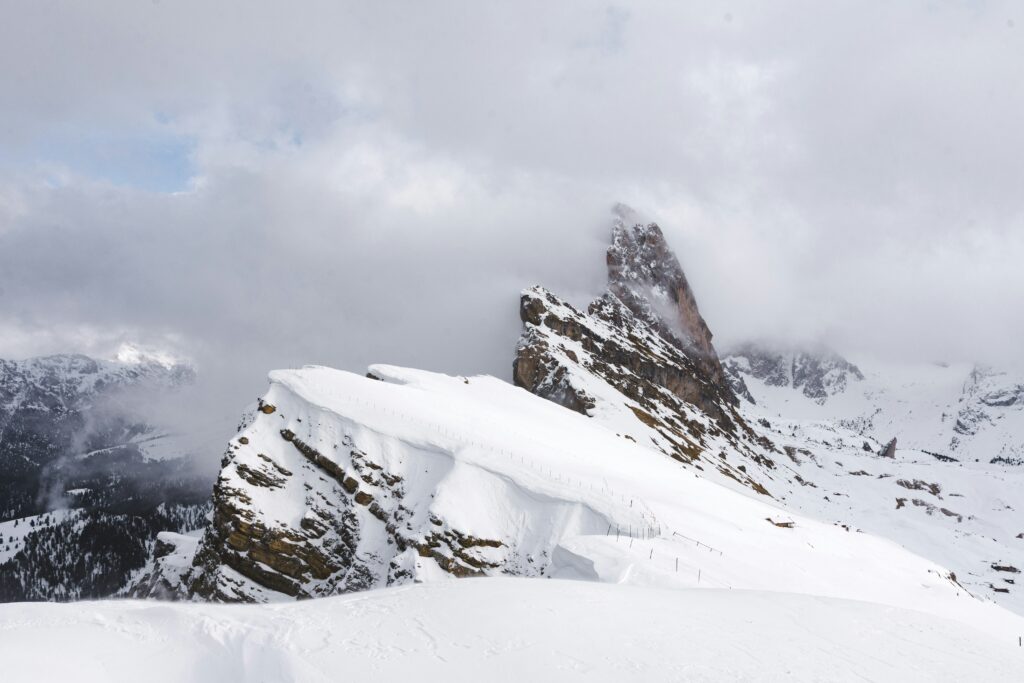
With your jelly legs, you’ve made it to the top! Now it’s time to reward yourself by exploring that incredible ridgeline. Some of the trails near those jagged peaks are closed off for safety reasons – but you can still get close enough to them! On the day we arrived, the weather was dry but there was lots of low hanging cloud, which just added to drama and eeriness of the peaks.
Once you’ve explored the summit and snapped all the photos you want, it’s time to loop back and start your descent. You can follow Trail 1 all the way down to Rifugio Firenze, which is pretty straight forward. Alternatively, if the conditions are slippery and a bit unfavourable (like it was for us) you can catch the chairlift down from the summit, back towards Col Raiser.
Although we wanted to continue the full Col Raiser to Seceda hike loop, the snow was really quite tricky. The chairlift was a bit of a welcome treat back down (no regrets!).
👋 Get in Touch
No matter which route you choose, the Seceda ridgeline will be the star of the show — jagged Odle peaks, sweeping Dolomites panoramas, and that unforgettable “edge of the world” feeling
We hope you found this guide helpful. If you have any questions please leave a comment below, we’d love to hear from you! If you found our blog helpful, check out our Insta @welovetravel.in – if you give us a follow feel free to drop us a message and say hello 
Interested to see where else we’ve adventured to? Check out our Travel Bucket List below